 Virtual
Tour Step 8
 Virtual
Tour Step 8
The Butts And Hammers

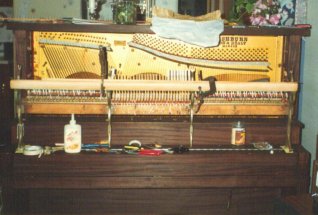
Now it was time to install the new butts. Replacements were bought and installed. After the butts were in place the new hammer shanks were installed in the butts and the shank travel was adjusted. Each butt with it's shank installed had to be checked to be sure that the travel was square. Shims were use to adjust any travel that moved to one side. It should also be noted that the shanks were measured, cut and glued into place before the travel was checked.
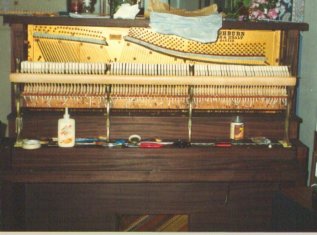
Next the hammers were installed. I started with the hammers in the middle. As you can see there are a number of hammers installed to the right and only one installed on the left. This is the way I install my hammers. I get a precise measurement of the two extreme hammers in any one section then use a straight edge clamped to the hammer rail in such a position that the hammer tails just rest on the straight edge. Now it is simple to just install all the hammers in between simply using the straight edge as a guide.

Here all the hammers have been installed and the whippens will be installed next. After the whippens were installed the keys were replaced and the action was mounted into the piano. Before any more work was to be done the key bed had to be set up.
1. The key height was set up and the keys were leveled by adding paper shims at the center rail.
2. The key dip was then set up by adding paper shims at the front rail.
3. The hammer let off was adjusted by using a 1/8" shim in place where the hammers strike the strings. The keys were depressed and the jack let off button was regulated until the hammers would just bump the shim.
4. The back checks were adjusted so the hammers checked at about 5/8" from the strings.
5. New damper felts were installed and the dampers were regulated.
This site is not intended to be a "Do It Yourself Guide." It is only to allow you who may be interested a chance to see what all is involved in the process. Many things were omitted for the sake of time and space.
The next steps have not been completed yet. They will have to do with the actual Player Mechanism. Check back next week for the additional steps.
Send E-Mail
Home Page
![]() "Get Out And Get Under The Moon"
"Get Out And Get Under The Moon"
All sound
content on this site is powered by Real Audio.If you do not have
a Real Audio player installed
you can download it for free by clicking here.![]()
| Piano Steps: | Step 1 | Step 2 | Step 3 | Step 4 | Step 5 | Step 6 | Step 7 | Step 8 |
| Player Steps: | Step 9 | Step 10 | Step 11 | Step 12 |
| Other Pages: | Home Page | Picture Album | Piano Room | Step Map | Links |
| Messaging: | Send Mail |
This page hosted by ![]()
Get your own Free Home Page