|
Step 9. Seamless
Montaging. to top
Now you must
resize your caps to the size you want them to appear on the final
product. What size you make them depends on how many rows you
want. I use two rows, so i make the images half my screen size.
I run the caps through a batch file to resize them all at once.
Once you have
collected your caps and planned out how you want them to go together,
you need to make your background. Create a new 1024 * 768 pixel
white background at 72 dpi. This is where you will place all
the images on in layers.
I like to have
ACDSee open at the same time as Photoshop so that I can drag
and drop the images onto the background instead of having them
all open at once. Take your first image, and place it directly
in the in the top left of the background.

Now here's the
tricky part, getting the next cap to fit perfectly with the first.
Here's where you use you own brain. How you choose to select
the image is entirely up to you. You can outline the image using
the lasso or use the pen. I prefer to use the pen then make a
selection from that, but a lot of people find the lasso easier.
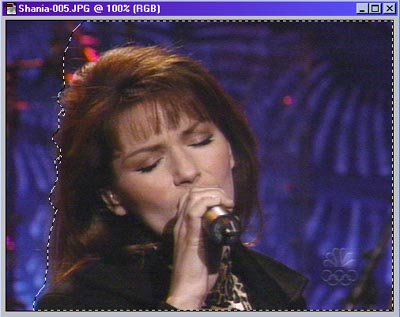
All you have to do is outline the left side of the image like
so:

Then drag the
selection over to the background and place it beside the first
cap. (You can also do this the opposite way, starting from the
right side of the background and moving all the images to the
right.) Repeat this process again for as many pics as you wan
to fit in that row. For the next row, drag the whole cap without
making a selection to the bottom left corner and continue to
add more selected caps to it.
Riddler has an
excellent new vidcapping faq that explains his own method of
seamless montaging which will no doubt be very helpful, check
it out here.

I usually fit
6 to 10 images per montage depending on the size of the capture.
I will fit less images of a close zoom in of the face than I
would of a far shot of the whole body. The advantage to using
the layers is that you can always go back and edit each individual
layer, move them around etc. Once you have finished montaging
them together you can add a fancy border. Be creative, but not
tacky. Make sure to put on the name and source ! What good is
a picture if you don't know who it is of?
My final product
in this case looked like this:

Well, I hope
this little tutorial helped you out. Just remember to keep your
work creative and original. Don't stop practicing and don't quit,
this takes time. An average montage takes me at least about over
an hour to do. I don't start unless I'm going to finish, and
I don't post anything that I don't think was the best I could
do. So, have fun !
|


