Star Sampler - Block 4


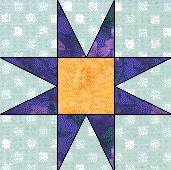
Eight Pointed Star 

Cutting:

4 – 4 ½” background squares
4 – 4 ¾” background squares
1 – 4 ½” center square (gold)
4 – 2 ¾” x 5 ½” rectangles for star points (dark blue) cut in half diagonally


  Sewing:

  To make star points  

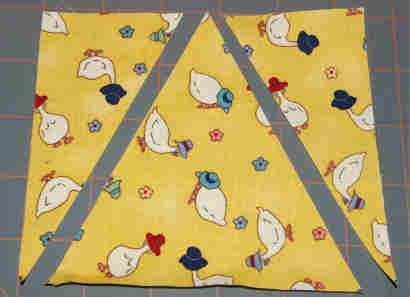
Mark the center of one edge of the 4 ¾” background square. To find the center fold the square in half and finger press the fold.  You may want to put a pencil mark at the top of the crease so you can see it better.

Place your cutting ruler with one edge on the center mark and the other on an opposite corner.

Using your rotary cutter, cut this edge of the background triangle.

Move your ruler so one edge is lined up with the center mark and the other on the opposite corner. Cut this edge.

The center triangle is what we will use and the outer (smaller) triangles will be discarded.


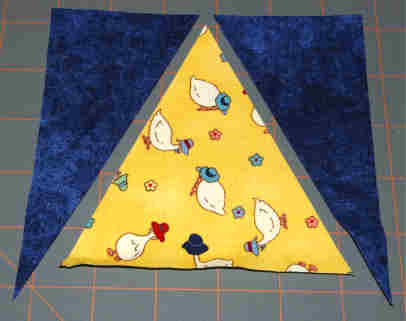
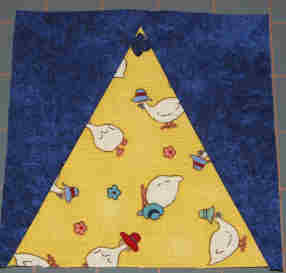
We will sew the two dark blue triangles to the sides of your background triangle. The dark blue triangles are made by cutting the 2 ¾” x 5 ½” rectangle in half diagonally.


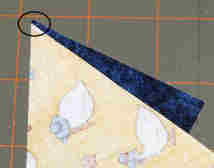
Here is a tricky part. When you line up the edges of the background triangle and the dark blue triangle allow the dark blue triangle to overhang the edge at the top of the background triangle by about 1/16 to 1/8 of an inch. Sew. Press the seam towards the dark blue triangle. 


Sew the other dark blue triangle to the background triangle. Again have the dark blue triangle overhang the background triangle. Press towards the dark blue triangle. Trim to 4 1/2" square.


  Sew block together 

ü     Following the layout of the block above arrange your 9 – 4 ½” squares.

ü     Sew the blocks together into rows and press seams away from the star point blocks (towards the solid squares).

ü     Sew rows together. Press.

ü     Check the size of the block. It should measure 12 ½”


Fabric Requirements Block 3 Block 6 Block 9
Block 1 Block 4 Block 7 Finishing 
Block 2 Block 5 Block 8  
1